Wednesday, January 21, 2015

Whipped Brown Sugar Scrub

I can't get enough of these homemade scrubs!  My friend's birthday was on Sunday (Hi Julia!) and I wanted to make her a little something special.  The last scrub I made was a coconut almond sugar scrub, the recipe can be found here. I wanted to try to make a different kind and I love how it turned out. The scrub is light and soft, yet exfoliates so well.  Coconut oil is so great for your skin and it's been making my skin so soft.  Below is my recipe for whipped brown sugar scrub.


Ingredients:

1/2 cup of coconut oil (solid)
1/4 cornstarch
3/4 cup of brown sugar
3/4 fine white sugar
2 drops of vanilla extract or essential oil

Start by adding the solid coconut oil (not melted) into a stand mixer.  Begin whipping it for about 2 minutes or until fluffy.  Add in the cornstarch, continuing to whip together.  Once whipped, add in the two sugars and drops of vanilla.  The consistency should be light and fluffy, slightly crumbly.  If the consistency is too moist, add more sugar, or if too dry add a small amount of more coconut oil. 


The scrub smells so good and knowing that it's made from pure ingredients makes me love it even more.  Side note:  The other night, my toddler requested that Daddy would read to her before bedtime.  You better believe I kissed her goodnight, ran down the hall, started the shower and locked that door!  Mommies need time outs too! ;)  This scrub is just a little indulgence at the end of the day.  

Enjoy!

Monday, January 19, 2015

Handmade Custom Wooden Print || Giveaway

Hello!  Hope you all had a great weekend.  I'm so excited to share these handmade wooden prints with you!  Lauren from Designbylulu creates handmade wooden prints from your very own photographs.  Using a process of transferring ink from a photograph into grains of wood, a rustic piece is created. Each and every piece is unique and has perfect imperfections.  I was given a print of one of my favorite pictures from our wedding and it turned out amazing!


Here are some more of my favorites...


These pictures would make the perfect addition to your home and would be a perfect gift to give, as well! Each picture ranges from $25-$30 and can be made using 4 x 6 or 5 x 7 photographs.   Be sure to check out Designbylulu here on Facebook and follow on Instagram: @designbyluluprints.  For custom inquiries, feel free to email at designbylulu@gmail.com.  Lauren has generously offered to giveaway one custom print to one lucky reader! Giveaway will end Wednesday, January 21 at midnight.  Winner will be announced on Thursday.  Good luck!
*Giveaway is open to US residents only. 

a Rafflecopter giveaway

Tuesday, January 13, 2015

Cast Iron Skillet BBQ Chicken Pizza || Recipe

Hello friends!  I wanted to share the recipe that I used for our homemade pizza we had this weekend. It was amazing!  Using a cast iron skillet created a super crispy crust on the bottom, while leaving airy dough on top = highly recommend! This recipe is also very quick and easy, perfect for a weeknight or to throw together during a busy weekend.


Ingredients:

Pizza Dough (I used fresh from the grocery store)
Honey BBQ sauce
Sliced cooked chicken
Red onion
Shredded Cheddar cheese
Fresh Cilantro

- Preheat oven to 400 degrees.  Place cast iron skillet in oven to heat up until oven is preheated. (If you're using a baking sheet or pizza pan, I'd do the same to ensure a crispy crust)
- Roll out pizza dough and shape into skillet, slightly forming up the sides.
- Cook dough for 10 minutes
- After dough has cooked for 10 minutes, remove from oven and spread dough with bbq sauce (I loved the slight sweetness of honey BBQ in contrast to the red onions)
- Layer with cheddar cheese,  sliced chicken, and red onion.
- Bake for 15-20 minutes or until golden brown.
- Sprinkle with fresh cilantro & enjoy!


Next time, I may try caramelized onions and chopped bacon as different toppings.  If you're not a huge cilantro fan, try fresh parsley.  It was so good and so quick...Olivia loved it as well! I'd love to hear if you try it!

Monday, January 12, 2015

Our Weekend || Pizza + Play-Doh

Hello!  Hope you had a wonderful weekend!  Ours was low key and that's exactly what I needed.  I almost feel like the Christmas season rush is finally dying down and things can slow down a bit.  My hubby was working all weekend so it was just me and my little munchkin.  She is at such a fun age now and I really enjoy my time with her - my favorite baby girlfriend ;)

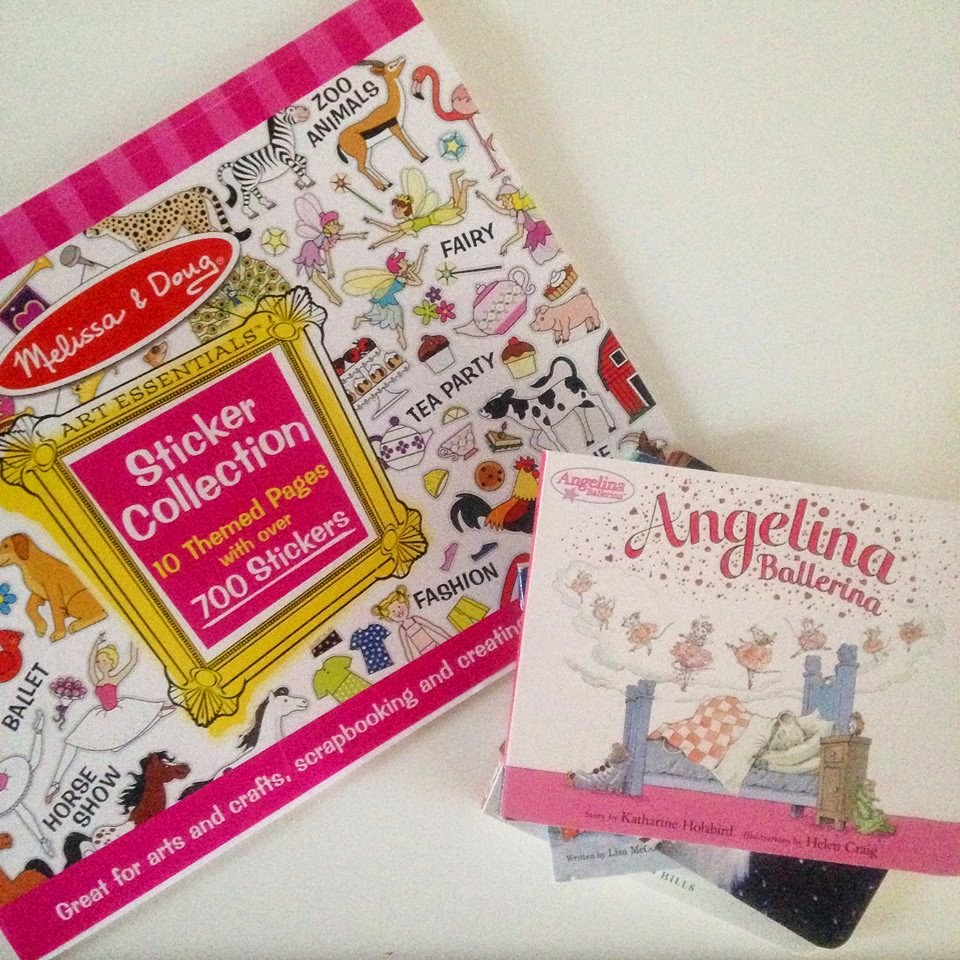
The weekend was a mix of shopping, playing, and cooking.  I took Olivia with me to run some errands at Target and stopped by TJ Maxx on the way.  I tend to always go to Home Goods, but will definitely be going back to TJ Maxx.  So many great finds!  Stickers are currently one of her go to activities so I was so excited when I found this huge Melissa and Doug sticker book for $2!  I browsed through their book section and found tons of Christmas books, most marked $1.50...amazing!  Perfect to buy now and put away for next year.


After we got home, we opened up some Play-Doh and had some snacks.  She will sit and play with Play-Doh for hours.  She loves to roll it out and make shapes...especially the dog bone, which she tries to feed to our dog.  


We also baked Bakery M&M cookies, using this recipe from Coordinately Yours.  They came out nice and chewy, the perfect sweet treat for a cold evening.  Olivia helped put the m&m's in.  Don't worry Mom, I washed her hands = salmonella free. She likes to hold a cookie in her hand, without eating it, for approximately 42 minutes while the dog follows her around, hoping for a crumb or two.  Not quite sure if she's my child... ;)

{Because baking in a tutu makes it so much more enjoyable}

Our fun filled afternoon slowly came to an end, as nap time was quickly approaching.  She started demanding to drink her milk from a measuring spoon while the cookies baked and I watched the clock counting down the minutes until Daddy came home.  So bossy those toddlers can be ;) 


For one of our weekend dinners, I made a cast iron skillet BBQ chicken pizza and it was amazing.   The crust was perfectly crisp and the toppings were the best part.   Recipe will be up tomorrow so you can try it at home!


Thanks for stopping by! Have a great day!

Tuesday, January 6, 2015

Spiralized Greek Salad || Recipe

Have you all felt the healthy eating itch lately?  After indulging in a good share of Christmas cookies, cakes, and chocolates I'm currently craving healthier foods.  Now, as a side note, I did text my sister this exact message last night: "Everyone is like lets get in shape! I'm over here like that chocolate Santa was goooood!" So lets be honest...it's all about moderation ;)

That being said, this salad was so fresh and so easy to make that I had to share it with you!  If you don't have a spiralizer (thanks Mom!) you can use a julienne peeler to create similar, but straight ribbons of cucumber.  Spiralizing the cucumbers made the salad so fun to eat!

SPIRALIZED GREEK SALAD 


Ingredients: 
Cucumber
Tomatoes
Red Onion
Feta Cheese
Kalamata Olives
Olive Oil 
Red Wine Vinegar
Lemon
Oregano 
Thyme
Salt & Pepper


Spiralize the cucumbers and dress with olive oil, vinegar,  oregano, thyme, salt and pepper.  


Top with your favorite Greek salad toppings.  My favorites are tomatoes, feta cheese, kalamata olives, and red onions.  Finish with a squeeze of fresh lemon. I served mine with lemon-thyme chicken.  

Enjoy! 


Sunday, January 4, 2015

How to Winterize Your Nails || Julep

{My new favorite clutch shown above can be found here}

Winter can be so tough on your skin, hands, and nails!  I wanted to share some tips on how to winterize your nails so you'll be ready to take on colder, drier weather with fresh, strong nails.  I'm a huge fan of Julep products and especially love their oxygen nail treatment and mighty nail and cuticle serum.   Following this guide will help you get your nails winterized in no time...

 
I always keep my nails on the shorter side because I'd hate to scratch my little one, and I'm a fanatic about filing them to make sure they are smooth and shaped.  I love the tip to warm the cuticle softener to create a spa-like treatment...perfect for momma time ;)  

My typical at home manicure consists of these steps:  

1.  Remove all polish to create a fresh, clean nail surface.

2.  Apply the oxygen smoothing base coat to fill in any fine lines and smooth the top nail layer.

3.  Apply two coats of your favorite nail polish and let dry between coats.  

4.  Apply the Freedom Polymer top coat (one of my favorites!) to create a gel-like finish.  

5.  Finish with the mighty nail and cuticle serum to keep those cuticles moisturized throughout the day.

*One of my favorite time tips is applying the Ta Da quick dry drops after completing the steps above.  Seriously a time and nail saver!


Julep has also released their new trending nail polish colors, which can also be seen here... I'm loving the "Isla" and "Joanne" for winter!


One last tip that I'd like to add is to exfoliate your hands.  Exfoliating really helps to rid your hands of dry, dead skin to reveal soft, smooth hands.  Have you tried to make your own sugar scrub?  A coconut almond sugar scrub would be wonderful to add to your beauty routine.  I shared mine here


Do you winterize your nails?  I'd love to hear some more tips on how you keep your nails hydrated and ready for colder weather.   Be sure to check out more Julep products here.  

*Disclaimer:  The Birds Nest was not compensated in any way to write this post or include any Julep products.  Opinions are strictly my own.

Saturday, January 3, 2015

Coconut Almond Sugar Scrub || Homemade

Hello!

I hope you enjoyed some festive New Years celebrations.  We had a low key night at my sister's house and everyone was in bed before the ball dropped,  #lifewithatoddler.  Anyway, it has been freezing the past few days and I have been wanting to try to make a sugar scrub to help with dry hands and skin from the cold.  This. Is. Amazing.  It smells so good and it is so easy to make!  Here is how I made my own sugar scrub.


1/4-1/3 cup of coconut oil
1 cup of white sugar
A few drops of almond extract (or almond essential oil)

Melt the coconut oil and stir in the almond oil and sugar.  Mix until ingredients are incorporated and store in an airtight container.  For use as both a hand scrub or body scrub.  Enjoy!


I can't wait to try to make a different scent next.  I'm thinking coconut vanilla or lemon sugar sound good.  I used a small amount after washing my hands and it really made them so smooth!  I'm a hand cream fanatic and I haven't reached for it once since I've been using the scrub.  This would be the perfect little gift for friends or as a hostess gift too! Let me know if you try it, I'd love to hear.


Blogger template designed By The Sunday Studio.