Here's a sneak peek before we begin:

Materials you will need:
Two 3x3 wood pieces (or premade blocks)
Wood Stain
Some sort of saw (if you are cutting your own blocks)
Vintage sheet music
ModPodge (I used satin finish)
Hot Glue Gun
Distress Ink (avail. at AC Moore or Michael's)
Glittery letters (or you can stencil them)
Step 1:
First, stain the wood in the color of your choice. I chose to go with a "redder" stain because I was only doing two coats and wanted it to have richer color. I found this spray paint-like stain, which I immediately scooped up!

Very easy to use and coated really nicely...

Now, let the wood dry and apply another coat if needed

 |
| My dad helped me stain them and we hung them from a nail while spraying
After the wood dried, my dad cut the wood into 2.5" blocks. Sorry no pics, but my dad was a trooper - there were a lot of them! Thanks Dad!! I needed 13 blocks to spell out "Joy to the World", but obviously count your blocks needed to create whatever saying you are using. I also had extra blocks incase there were a few mistakes (or for a future project!)
|


We lightly sanded the edges where the cut was to make sure there would be no splintering.
Step 2:
After the blocks were dried and cut (there were a few days in between this), I measured the blocks on the vintage sheet music and lightly traced around the edge. If you are wondering where to get vintage sheet music, Ebay is a great place to look. I got 5 books of sheet music for around $6.

After I traced around the block, I ripped the page lightly all around to create the torn look. Little did I know, I was tearing through two pages which ended up being a time saver! I would definitely recommend tearing two pages together to create two little squares.

Then, fit it onto the block and rip any little pieces that do not fit along the edges.

Now, time to use your distress ink. The pages were slightly yellowed already, but I wanted to add a more vintage feel.

Lightly press the page onto the ink pad...

Then, use your ModPodge to glue the paper to the block. I also used the ink on the blocks around the edges to make sure the whole block looks stained. You could take the time to stain each side, but I just stained the entire wood piece then cut, leaving two sides without stain...you won't see the back right ? ;)
 |
| Apply ModPodge in a thin layer |
 |
| Place the sheet music onto the top of the block covered in ModPodge |
Now do the same thing to the other blocks...


When they are all done, put a light coat of ModPodge over the top of each block to seal the sheet music on. This also made the paper a little darker which I liked.
Annabelle guarded the music just incase ;)

Step 3:
Pick out your letters and place them on your blocks accordingly. Before I placed the letters, because I have OCD I made sure that the blocks lined up nicely, trying to create a nice flow from block to block with the way the music looked.
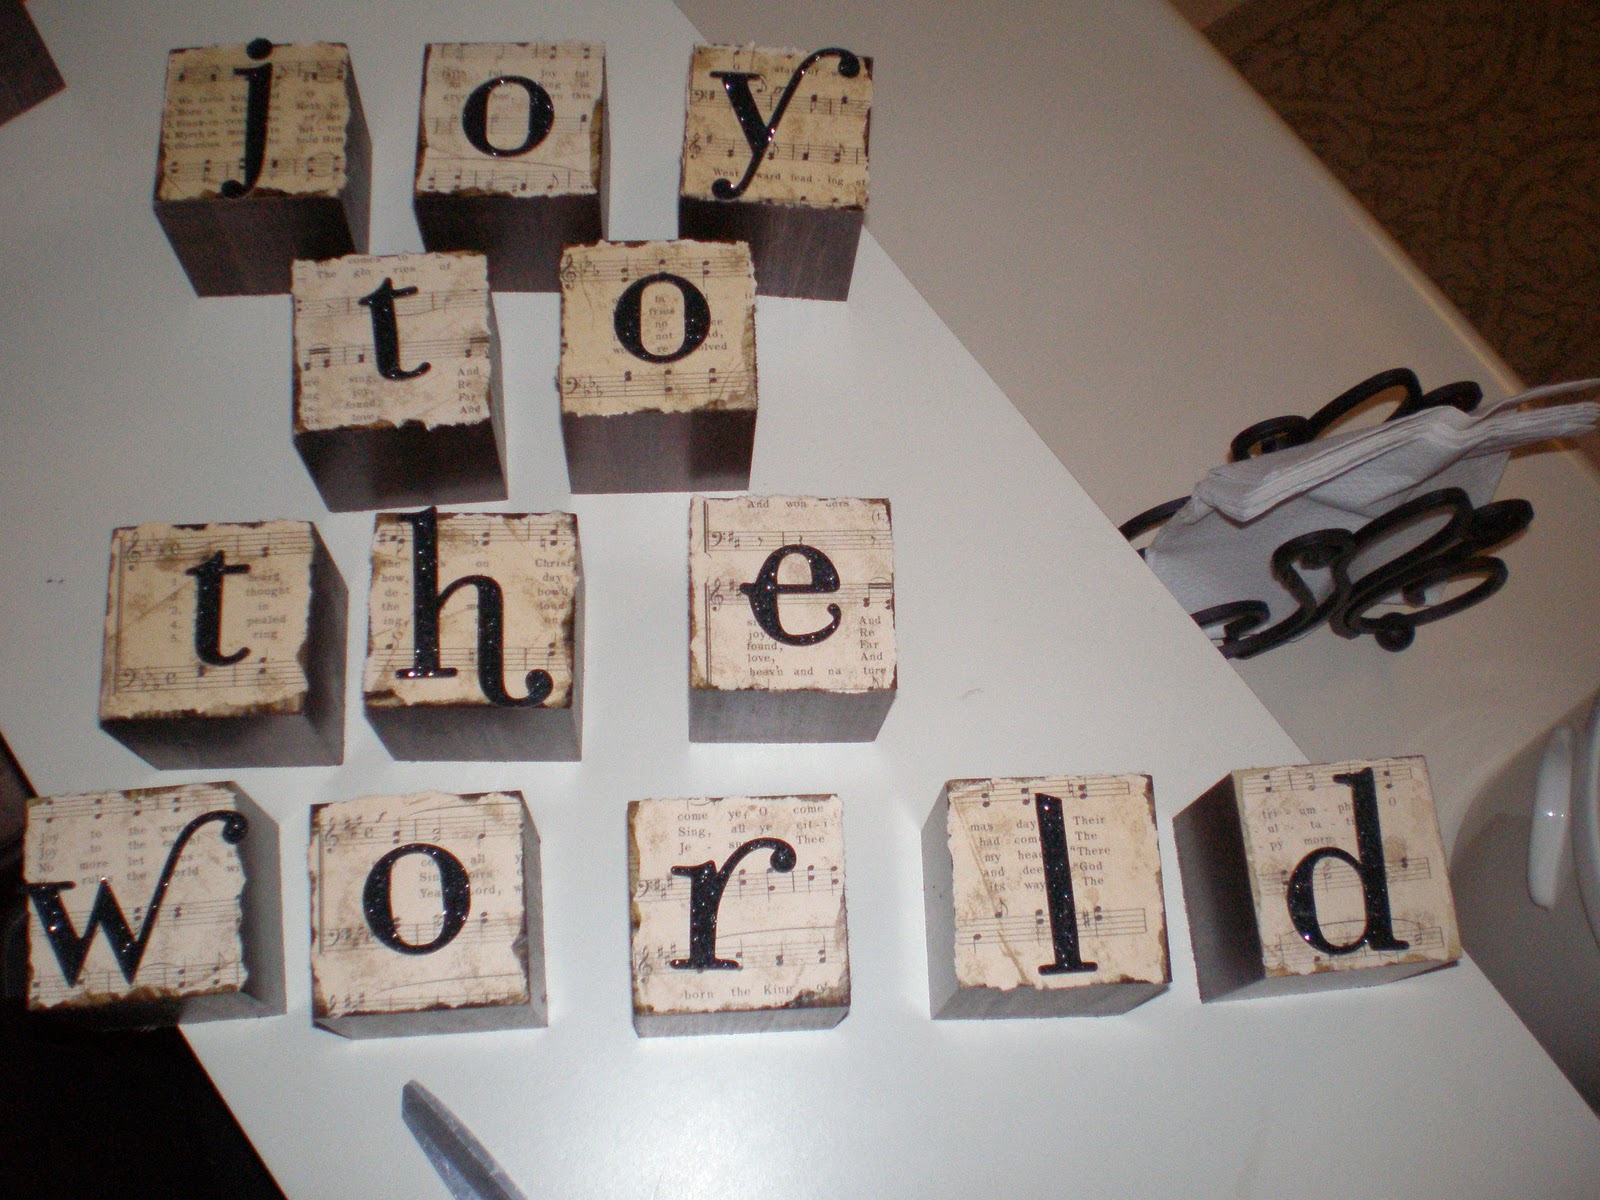
Once the letters are lined up to your liking, or to satisfy your OCD like me ;) use your glue gun to attach the letters to the blocks.


The "W" was a little too big with the swirly part, so I cut off a little then glued it back together to make the swirl shorter.


Step 4:
Show off your hard work! I am obsessed with these...I mean true love...
I put them in my hutch to see how they would look...don't mind the fall stuff...it's all coming down this weekend to put up Christmas!!

again...

from the side...

another...

and another way...

I absolutely love them & I hope you do too! I'd love to see if you make your own version!


I absolutely Love Love Love these!! Looks like I have another project to start working on hahaha...oh how my hubby must love me :)
ReplyDeleteBrilliant! Trust me, I get the whole OCD thing..LOL!
ReplyDeleteTake care,
Lisa
I love these~ they came out just beautiful!! What a great idea with the sheet music! Stopping by from Funky Junks~ Nice to meet you!! :)
ReplyDeleteThese are so gorgeous, thanks for the hint of where to find vintage sheet music.
ReplyDeleteOooh, I LOVE these! They really so look gorgeous and I wish I had room for more Christmas decor!
ReplyDeleteI'd love it if you'd stop by and link these up to Favorite Things Friday over at The Speckled Dog.
http://thespeckleddog.blogspot.com/search/label/Favorite%20Things%20Friday
What a great post! I would love for you to link this up to my linky party! http://danajeanward.blogspot.com/2010/11/link-up-giveaway-and-winner.html
ReplyDeleteBeautiful...love the way they turned out!!
ReplyDeleteI love the music paper behind the letter. What a great touch!
ReplyDeleteI'm your newest follower. Will you follow me back?
www.uvinyl.blogspot.com
These are so cute! I love it!
ReplyDeletehttp://carriscraftingcorner.blogspot.com
wow, so beautiful! Would make a great gift! Thanks for sharing.
ReplyDeletehttp://just-starting-out.blogspot.com/2010/12/take-peek-inside-our-home-for-holidays.html
Just dropping by to let you know that I linked to this post in a round up today from the Home & Garden channel at Craft Gossip. :) This will appear in the main Craft Gossip RSS feed, on the main home page and can be found directly here
ReplyDeletehttp://homeandgarden.craftgossip.com/9-noel-and-joy-projects/
If you would like a "featured by" button, you can grab one here!
http://homeandgarden.craftgossip.com/grab-a-craft-gossip-button/
Super cute idea! I know I say this a lot, since blogging, but I really really love these :)
ReplyDeleteHappy Holidays!
Michelle
Very cute! I love the vintage sheet music you used to make them.
ReplyDeleteGreat tutorial - they look so cute!
ReplyDeleteGreat job! Great tutorial!!
ReplyDeleteI'll be back later to read more of your blog.
blessings
barbara jean
Kaitlyn,
ReplyDeleteHope you do not mind, but I put your Joy Blocks on my post today, and a link to your site.
Just thought all should see them they are so great!
blessings
barbara jean
PS not OK? email me and i will take it off. =)
Love these!!!
ReplyDeleteBlessings,
Amy
Hi Kaitlyn,
ReplyDeleteI came over from Barbara Jean's blog and I love the blocks. I made some similiar ones with my grandkids pictures on them. Aren't they fun to make?
I am becoming a follower!
xo, Karen
i have that same rudolph sheet music! mine is in worse shape but it was my mom's and we haul it out every christmas to play and sing.
ReplyDeleteWhat a fun project! I just love these! Wish I had time to make some! Maybe next year...Would love for you to visit me at Sew Chatty and link up to Made with Love Monday! The party will be open until Friday if you want to link up multiple projects. Hope you have a great day! http://sewcahtty.blogspot.com
ReplyDeleteSo cute! Looks like it took a lot of effort- great job!
ReplyDeleteAdding these to the Christmas Craft list right now!!! What a unique idea...makes the holidays extra special!
ReplyDeleteDo tell, where did you get your letters? I've only really seen sticker letters, so I'm wondering where else to look, or if I'm totally missing a specific area of the store I should be looking at. I want to make these this week, so I'd really appreciate some feedback!
ReplyDeleteI actually got the letters from Michael's craft store...they are also available from A.C. Moore. Most likely they will be in the scrapbooking section of any craft store...hope that helps! Good luck and have fun!
ReplyDeleteHi Kaitlyn !! Love your blog. Actually I´m also a DIY addict!!
ReplyDeleteI'll like to invite you to come and visit mine too..
Love to have you there!
http://handmade-style.blogspot.com.br/
Raquel
Hi, Love the blocks. SOOO cute. Hey can you share what font you use for this?? Love it. Thank you!!!
ReplyDelete
ReplyDeleteCouples have practiced its version of erotic sizegenetics in homes for decades. Some are skilled inside art of sizegenetics, and some are definitely not, but for most, the touch of an other is enough to instigate foreplay and a satisfying sexual experience. It will be an even more stimulating encounter for some if you happen to add the mystery of one's unknown, when it truly is with someone you try not to know, or fail to know well. It is really not wise, however, to set yourself up for physical abuse or theft, simply for your personal experience of enjoying the hands of a typical stranger.
http://buysizegeneticsonline.tumblr.com/
astounding site style and design free online casino
ReplyDeletethe actual blog page is furthermore spending my personal costs http://onlinecasinoworld.weebly.com best online casino
ReplyDelete