Monday, December 20, 2010

Blog Swap: Featuring Crafty Cierra

Hey everyone! My name is Cierra from CraftyCierra. I am so excited to be here today! Let me tell you a little bit about myself...I love to create things, try new recipes, & plan parties, which is what my blog is all about! I love to share my ideas with others, in hopes that they may be inspired by them, as I have by all of your amazing blogs!
I do a Wild Wednesday Party every week, along with a feature. I pick someone from the party to feature the following week! So be sure to link up!
Here are a few of my projects I want to share with you today!
Most of everything I make, I also sell in my Etsy Shop. Stop by to see what I have. I also do custom orders. Right now I am selling Kids' activity books for only $1.99. The books have 25 different activites to do. You can get 10% OFF in my shop by using the code "Christmas1". I am also doing a giveaway right now at my blog. 1 Lucky winner will win a $30 Gift Certificate to CSN Stores.
Thanks so much for stopping by! Make sure to visit my blog for more fun ideas & tutorials!
Happy Crafting!
Cierra

Thanks so much for blog swapping Cierra!

Friday, December 17, 2010

Wrapping gifts...again?

Would it be crazy if I unwrapped all of my Christmas presents to my hubby and family only to wrap them again?? Everyone has at least one crazy holiday moment (right?!) and this might just be mine :) After seeing all of these:


...I might just be unwrapping other people's gifts today, because these sure stand up my green subway art merry christmas paper. Another reason for this insane holiday moment  change of plans are these cute little gift tags found here.  Emily at Jones Design Company designed these gift tags that are freebies!! Yay! She is the inspiration to many of my projects such as my painted wallpaper and my recipe wreath

Anyway...is that crazy to rewrap everything?!...we'll see what the day brings :)


Thursday, December 9, 2010

Decking the Tree!

Whew...it's been a little while since I've posted...lots of decorating here at The Birds Nest!  We actually have two trees this year ~ one real one and one artificial that my hubby had from last year.

While my hubby was at work one night, I set up the fake tree in our bedroom... quite the surprise when he got home :)  I decided that I wanted that tree to be the home to all of our traditional, mismatched, different color, etc ornaments.  It looks really nice and it's a nice mix of yours, mine, and ours :)

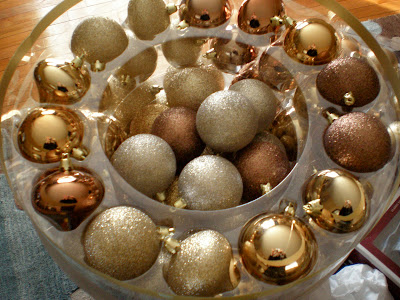
The real tree is in our living room, which has blues, browns, and tans. You can image my hubby's face when I said there would be NO reds, greens, etc. on the real tree!! I found these beautiful ornaments at Sam's Club...I know! 100 shatterproof ornaments in gorgeous bronze, golds, silvers... absolutely love them....


The larger ornaments were a few layers down and they were the exact color I was looking for!  I also picked up a few blue ornaments from Walmart that were equally as sparkly.  

First, my hubby and I laid everything on the table so we could see what we were working with:


It doesn't look like much here, but boy is this tree dripping!  The little birds came from Macy's 50% off :) Snowflakes & gold ornaments from Target and the Dollar Tree, bead strands from Michael's.  Have you checked out the Dollar Tree lately?? They have so many sparkly ornaments and you would never know they were only a $1!

Here we go...


...and truly sparkly at night...the real thing is much more beautiful in person!


Ahh...I wish you could see it in person...looove it!

I also put together a hot cocoa station. I saw this cute idea over at My Sweet Savannah. This is definitely one of my favorite Christmas ideas!

The apothecary jars are from Home Goods and T.J. Maxx...


I made the little glass holding the candy canes by gluing a Dollar Tree glass and candlestick holder together using Gorilla Glue. I think it came out nicely!


I added a little snowflake hanging from ribbon, both from the Dollar Tree


Hope you enjoy this post! More Christmas decor at The Birds Nest coming soon!


Tuesday, November 23, 2010

DIY Vintage Christmas Blocks!!

I'm soo excited to share this project with you! I think they came out great and I LOVE them!!  My grandfather made my mom a set for her house that read "Merry Christmas" and he used wooden letters and paint for his.  This is a different version I created for my love of vintage sheet music.  Enjoy!

Here's a sneak peek before we begin:


Materials you will need:

Two 3x3 wood pieces (or premade blocks)

Wood Stain

Some sort of saw (if you are cutting your own blocks)

Vintage sheet music

ModPodge (I used satin finish)

Hot Glue Gun

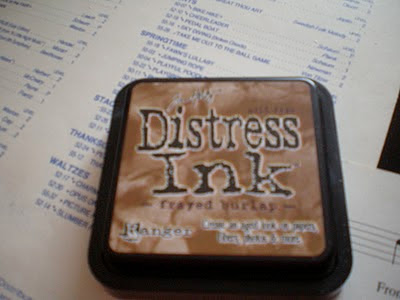
Distress Ink (avail. at AC Moore or Michael's)

Glittery letters (or you can stencil them)

Step 1:

First, stain the wood in the color of your choice.  I chose to go with a "redder" stain because I was only doing two coats and wanted it to have richer color.  I found this spray paint-like stain, which I immediately scooped up!


Very easy to use and coated really nicely...


Now, let the wood dry and apply another coat if needed


My dad helped me stain them and we hung them from a nail while spraying


After the wood dried, my dad cut the wood into 2.5" blocks.  Sorry no pics, but my dad was a trooper - there were a lot of them! Thanks Dad!! I needed 13 blocks to spell out "Joy to the World", but obviously count your blocks needed to create whatever saying you are using.  I also had extra blocks incase there were a few mistakes (or for a future project!)


We lightly sanded the edges where the cut was to make sure there would be no splintering.  

Step 2:

After the blocks were dried and cut (there were a few days in between this), I measured the blocks on the vintage sheet music and lightly traced around the edge.  If you are wondering where to get vintage sheet music, Ebay is a great place to look.  I got 5 books of sheet music for around $6.  


After I traced around the block, I ripped the page lightly all around to create the torn look.  Little did I know, I was tearing through two pages which ended up being a time saver!  I would definitely recommend tearing two pages together to create two little squares.  


Then, fit it onto the block and rip any little pieces that do not fit along the edges.


Now, time to use your distress ink.  The pages were slightly yellowed already, but I wanted to add a more vintage feel. 


Lightly press the page onto the ink pad...


Then, use your ModPodge to glue the paper to the block.  I also used the ink on the blocks around the edges to make sure the whole block looks stained.  You could take the time to stain each side, but I just stained the entire wood piece then cut, leaving two sides without stain...you won't see the back right ? ;)


Apply ModPodge in a thin layer

Place the sheet music onto the top of the block covered in ModPodge

Now do the same thing to the other blocks...


When they are all done, put a light coat of ModPodge over the top of each block to seal the sheet music on.  This also made the paper a little darker which I liked. 

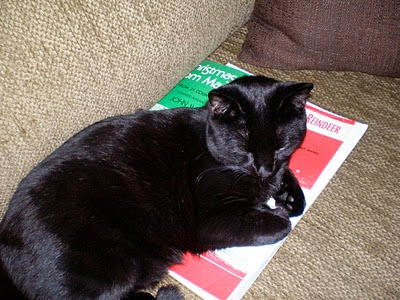
Annabelle guarded the music just incase ;)


Step 3:

Pick out your letters and place them on your blocks accordingly.  Before I placed the letters, because I have OCD I made sure that the blocks lined up nicely, trying to create a nice flow from block to block with the way the music looked.  


Once the letters are lined up to your liking, or to satisfy your OCD like me ;) use your glue gun to attach the letters to the blocks. 


The "W" was a little too big with the swirly part, so I cut off a little then glued it back together to make the swirl shorter.


Step 4:

Show off your hard work! I am obsessed with these...I mean true love...

I put them in my hutch to see how they would look...don't mind the fall stuff...it's all coming down this weekend to put up Christmas!!


again...


from the side...


another...


and another way...


I absolutely love them & I hope you do too! I'd love to see if you make your own version!


Blogger template designed By The Sunday Studio.