Friday, October 26, 2012

Baby Bird - 12 Weeks


Good Morning!  This post is a little late, as we just got a new puppy.  Calling me crazy?  Me too!  She's very sweet but super nuts energetic!!! 
She has kept me very busy the past few days!  We're so happy that we adopted her because I think she'll be a great little friend for the baby. 

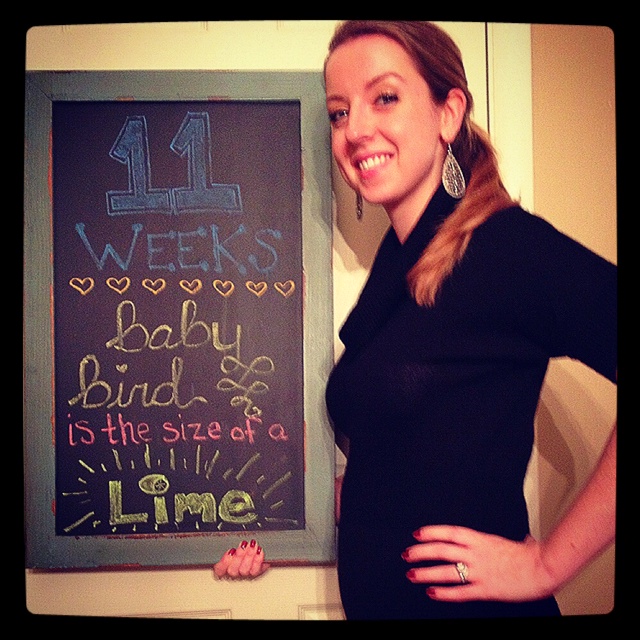
Anyway, on to the 12 week update...Here is my take the picture right now because the puppy is squirming and the chalkboard is falling picture...

My chalkboard for the week...


This isn't a great picture of it, I really need to hang up the chalkboard but for now it will do.


How far along? 12 Weeks
Total weight gain: Between 3-5 lbs. 
Maternity clothes? No but I can see them coming soon...hello leggings
Stretch marks? none yet…hopefully it stays that way!
Sleep: Super tired…hmmm a certain puppy might have to do something with this
Best moment this week: Our 12 week sonogram...so cool to see the baby's arms and legs moving 
Miss Anything? My jeans seem to be tighter this week so I'd have to say I'm missing my jeans being comfortable
Movement: Not that I can feel…but we saw a lot on the ultrasound
Food cravings: I've been wanting a cheeseburger pretty much every day...not just any cheeseburger but a Five Guys cheeseburger...I've only had one but it was gooood...my hubby is very happy with this because burgers are his favorite food...mine not so much...so weird
Anything making you queasy or sick: I've been feeling a little queasy in the mornings...hoping that goes away as we hit the second trimester
Gender: Don’t know yet…we should know by Christmas!! Can’t wait to know! Prediction: Girl
Labor Signs: Nope.
Symptoms: Heartburn...how I loathe thee
Belly Button in or out? in
Wedding rings on or off? on
Happy or Moody most of the time: Happy...but feeling a little overwhelmed this week by our new addition
Looking forward to: Shopping for some new clothes

Hope you have a great week...off to do some puppy training!


Linking to: Weekend Bloggy Reading

Wednesday, October 17, 2012

Baby Bird - 11 Weeks

Hello There!

It's been quite a while since I've posted and things have been quite busy around here at The Bird's Nest.  We just bought our first home and we're expecting our first baby in May!  From now on there will be a mix of diy home projects and super cute chalkboard updates about Baby Bird.  I love the idea of using a chalkboard to track the baby bump progress :)  I first found the chalkboard on Little Baby Garvin (so many cute ideas!) and of course all over Pinterest...so thank you for the inspiration!

To start, this is what my hubby came home to about 5 weeks ago:


and of course this:


He was super excited and we were both very surprised!  Fast forward about five weeks and this is the latest chalkboard update at 11 weeks:


I love my chalkboard!  Every Monday, I'll be another week along so another chalkboard update! :)  Now for some other updates...

How far along? 11 Weeks
Total weight gain: Not sure…finding out tomorrow at drs. Apt.
Maternity clothes? Nope
Stretch marks? none yet…hopefully it stays that way!
Sleep: Super tired…I’m lucky if I stay awake past 8…I’ve been in my pajamas since 5:45 most nights! J
Best moment this week: I can’t wait for my appt tomorrow, hopefully we can hear the heartbeat
Miss Anything? Sushi and sleeping through the night without having to get up to go to the bathroom every few hours!
Movement: Not that I can feel…we’ll see on the ultrasound on Monday J
Food cravings: Not yet…although a few days ago I was eating chips and salsa like I’d never have access them again!!
Anything making you queasy or sick: Mustard – even thinking about it…thankfully I’ve had no morning sickness at all…just a little queasy if I don’t eat after I wake up
Gender: Don’t know yet…we should know by Christmas!! Can’t wait to know! Prediction: Girl
Labor Signs: Nope.
Symptoms: Worst heartburn of my life! Super tired…hoping to get my energy back soon
Belly Button in or out? in
Wedding rings on or off? on
Happy or Moody most of the time: Happy & excited…moody at times though…only when I’m hungryJ
Looking forward to: Drs. Appt tomorrow and ultrasound Monday!

That's all for now.  Off to do some organizing at the new house! Hope to see you check back soon for more updates!  Thanks for reading!


*Linking up to Serenity Now's Weekend Bloggy Reading*

Weekend Bloggy Reading

Tuesday, May 29, 2012

Bachelorette Party Welcome Baskets


My sister's bachelorette party was this weekend and beforehand I wanted to do a little something to make our girls weekend start off extra special.  Here's what I came up with:


I made the labels and simply taped them on after peeling off the store labels - super easy and made them super cute and personalized.  Here's what the bachelorette welcome baskets included:

* Two personalized water bottles
*Chapstick
*Tissues
*Orbit gum
*Oatmeal breakfast squares
*Ghiradelli chocolate squares
*Nail file

The baskets were from the dollar spot in Target and there were a variety of colors and styles.  I think these came out so cute and you can definitely add other little things such as little bottles of wine, granola bars, nail polish, hair ponytails...etc!  Super cute and relatively inexpensive...hope this inspires you to make your own welcome baskets for all occasions!! Leaving you with some pictures of this past weekend's bachelorette festivities...


{Bridesmaid Teresa, Bride to be - Kristen, Me}


{Me, Bridesmaid Kelli}


{Kelli, Briana, Teresa, Me, Kristen - ending the night!}

More pics of my sister's bridal shower will be coming soon! 


Thursday, May 5, 2011

Boy it's been a while!

Hello Friends!

I know it's been a while since I've posted, but exciting news here! I finally got another teaching job :) For those of you who haven't read earlier posts, I used to teach Kindergarten and the classroom was eliminated, therefore, eliminating me boo. As a result of that, I've become a stay at home wife and mom to my kitty :)

All that has changed and I'm now teaching 4th grade, covering a maternity leave. Yay!

I will definitely be posting more soon and have a ton of diy projects just waiting on my camera to be blogged about :)

Wednesday, March 2, 2011

Picture Walk: No Sew Rosette Pillow

Hello everyone!  This is a quickie picture walk for a no-sew rosette pillow! To begin:
{Measure for pillow size, leaving at least 1 inch on all sides}


{Turn inside out}


{Liquid Unique Stitch: aka no sew}


{Apply 1/2 inch in from cut side, repeat on 2 more sides}


{Insert pillow form and fold up the opening, apply unique stitch glue}


{Seal opening all the way}


{Cut stripes of fabric, about 1 inch wide}


{wrap around finger to create rosette, this may take a few times to get the "rose" look}


{create more rosettes...}


{arrange in your letter or design of choice}


{arrange rosettes on pillow}


{apply unique stitch glue to back of rosettes, insert small pin to hold middle in place}


{admire your no-sew rosette pillow!}


Hope you can create your own no-sew pillows using this picture walk to help!!

Sharing with:


Wednesday, February 9, 2011

Woohoo: Versatile Blogger Award!


So I was super excited to get the Versatile Blogger Award from Nifty Thrifty Things


Now to pass along the award & follow the rules I have to answer a few questions :)

Thank the person who awarded you & link them back in your post.

Thank you sooo much Nifty Thrifty Things!!! I'm so excited that you included me in your list!

Tell everyone 7 random facts about yourself.

1. I have a twin sister, but people would never know we were even sisters

2. I'm fairly new to blogging and I love it, at times I really should set a time limit as to how long I'm reading the blogs I love... who needs to do laundry right?!
  
3. I always add an extra “R” in survey when I’m typing…as in survery…

4. Some of the nicknames between the hubby and I came from an Orbit commercial

5. I love the movie "Elf" and I will watch it any season, any time

6. Our cat, Annabelle, is our little fur baby who acts like a real person and occasionally does ninja moves on our sliding glass doors. 

7. My mom met my hubby and my sister's fiance on the same day (it all started with a football) a while before we all started dating

Pass the award on to 15 bloggers.

Here are  15 amazing (and some new to me) bloggers! 


Contact each bloggers and let them know you've passed the award on to them, & let the "giver" know you accept the award.
Notifying now :)

Have a great day!


Sunday, January 30, 2011

No Sew Pillows!

Hello Everyone!

Hope you are having a wonderful Sunday :)  I'm so excited to share these pillows with you! I had no idea what I was doing & the result turned out great ~ don't you love when that happens!  I'm sure many of you have seen the Ballard Design "Mr. and Mrs." pillows, here's a refresher:
{Ballard Design}
I loved them when I saw them, just the right amount of rustic.  I've seen other bloggers recreate these (so cute!) and I thought why not??  I also stopped into Home Goods the other day and admired their pillows, but the $50 price tag - I think not. Off to Joann Fabrics I went...

{If you do not have a fabric store near you, click on the link to Joann Fabrics above and you can order from their website!}

Okay, lets get started... here's what I used to create 2 pillows:


  • 1 yard of burlap-looking fabric
  • 2 pillow inserts (small - also found at Joann's or Ikea)
  • No Sew Glue
  • Silhouette machine or stencil equivalent
  • Fabric Paint
  • Small Paintbrush


I started my Ballard Design pillows by laying out the fabric, doubled to have a front and back with one cut and placed the pillow insert on top, leaving approximately 1 - 1 1/2 inches all around.  Again, no clue what I was doing... just trust me ;)... knock-off say whattt


...ya know just eyeball it ;)


Once those are cut, start with your stencils!  I used my new Silhouette machine, but you can use any type of stenciling method you have on hand.


I made the letters about 3" tall...


Tape the stencil to the fabric using any tape you have and try to center the letters where you would like them on the pillow.  I tried to stay in the upper middle part. I added a small sheet of waxed paper in between the fabric, which really helped the letters not to stick to the bottom piece.  Now, paint inside of your stencils using a small brush.  Only use a small amount of paint to create the rustic, stamped look...


  Remove the stencil after you are done painting, before paint dries


and continue with "Mr."...


now let dry side-by-side...awww...love.


now, the fabric paint states that you need to let the fabric dry for 4 hours...whatt?! I think not.  If you are impatient like me, let dry maybe 25-30 mins then check it out for tackiness.

After they are "dry," apply a thin line of glue about a 1/2 from the edge and leave about 1 inch at the top of the fabric:

Do the same to the other side, leaving the top of the fabric open to slide pillow insert in.  Let dry inside out for at least 15 minutes on the dining room floor a flat surface:


When the glue is dry (or strong enough to not pull apart) turn the covers inside out again, right side in...whatever...just the right way with the words on the front :)


Slip in the pillow insert...


and you are left with some excess fabric, so I just folded it up nicely to close the seam and glued it shut like this:


and there you have it!  Easy right?? I love them...


Hope you've enjoyed this tutorial: now go make your own no sew knock-offs!!

Linking to these lovely parties:


UndertheTableandDreaming


Weekend Bloggy Reading


Funky Junk's Saturday Nite Special


Blogger template designed By The Sunday Studio.